Breathedge 2 Suit Upgrades: Materials, Order & Set Bonuses
Upgrading your suit in Breathedge 2: the DIY module system, the 106-point Cold Protection build with costs, and the upgrade order that wastes least material.
FAQ
Does the suit itself level up in Breathedge 2?
Do suit upgrades break?
Can I use a first-game upgrade list for the second game?
Your suit is the only thing standing between you and every hazard in the game, and the upgrade system is not a menu of stat sticks — it is the same DIY module rig you use to build tools. This page covers where upgrades happen, the confirmed material costs, and the order that gets you through Chapter 1 without spending scarce parts twice.
Where do you upgrade your suit?
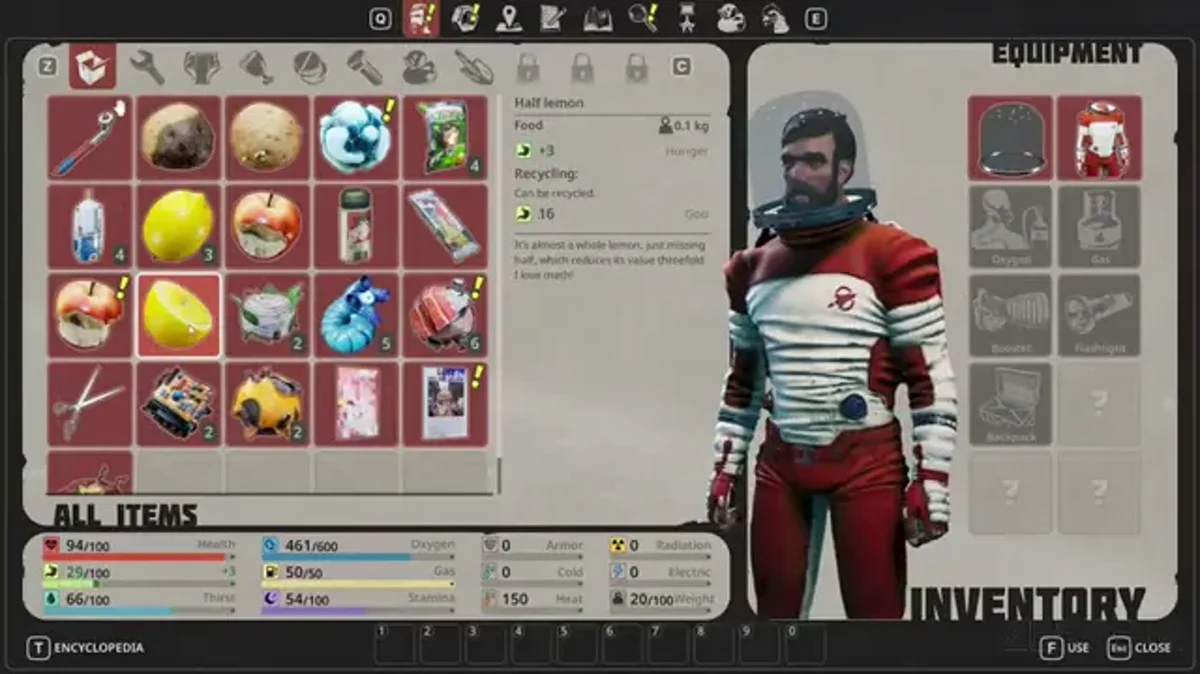
At the Space Suit wardrobe on the train. Suit protection is not crafted at a bench and auto-equipped: you open the wardrobe and install items into three slot groups — torso, arms (left and right), legs (left and right). Anything Protective-category can go in there, including things that are obviously junk: cardboard, foam, a knitted teddy bear.
- Each piece carries a separate resistance type — cold, heat, or radiation. A cold set does nothing in a hot zone, and vice versa.
- The wardrobe is the only place the value assembles. Items sitting in your inventory contribute nothing, which is why the same “I crafted it but the quest did not update” confusion affects the Cold Protection gate.
How does the DIY module system work?
This is the second game’s core crafting mechanic, straight from the developers’ own design notes:
| Rule | What it means for your build |
|---|---|
| Basic tools are crafted from raw material as prototypes (the crowbar is the example they use) | Your first toolkit is cheap and early |
| Advanced upgrades need a dedicated workbench; everyone gets a “garage” plus a free starter toolbox | Some upgrades are gated behind finding the right station, not the right material |
| Seven module categories: Sharp, Impact, Utility, Protective, Active, Capacity, Biological | Only Protective feeds suit resistance; the other six feed tools and machines |
| Modules have rarity and quality tiers | A better Foam is possible; nobody has published the tier values yet |
| The same module type competes between gear crafting and world repair | Every Protective module you staple to your arms is one you cannot spend repairing a machine |
Durability works the same way across tools and armor. Base tools never break — described by the developers as intact and eternal — but the modules mounted on them do wear out, and a broken module is partly recoverable as raw material. Undamaged modules can be moved between tools, but never duplicated. Practically: upgrades are a consumable budget, not a one-time purchase.
What should you upgrade first?
The order below is driven by Chapter 1’s actual gates rather than by theory. Costs are the confirmed Early Access numbers.
| Priority | Upgrade | Cost | Why it goes here |
|---|---|---|---|
| 1 | First tool (crowbar-type prying tool) | ~2 Metal | Unlocks Break/Cut interactions on containers and panels; without it, harvesting anything structural is guesswork |
| 2 | Backpack | 4 Titanium | Carry goes 110 to 185 (+75). Every later run is longer and fewer trips are needed |
| 3 | Cold Protection to 100 | 1 Knitted Teddy Bear + 2 Foam + 2 Cardboard | Hard Chapter 1 objective; the known set totals 106 |
| 4 | Oxygen supply upgrades | Unconfirmed in EA | See the note below — do not plan a route around this yet |
| 5 | Heat / radiation sets | Unconfirmed in EA | Both hazard types are confirmed to exist, but no verified recipe list covers their gear |
What does the Chapter 1 cold build cost?
The single most concrete upgrade plan available in Early Access, from a player-measured set:
| Slot | Item | Cold Protection | Material source |
|---|---|---|---|
| Torso | Knitted Teddy Bear | +34 | Salvaged — spawn points unverified by a second source |
| Left arm | Foam | +22 | Yellow insulation lining on station structures, harvested with the Cut verb |
| Right arm | Foam | +22 | Same, second harvest |
| Left leg | Cardboard | +14 | Early scavenging, common |
| Right leg | Cardboard | +14 | Early scavenging, common |
| Total | 106 | Six points over the 100 requirement |
A matching full set also grants a set bonus on top of the slot values, and armor degrades and must be replaced — so build the cold set once, then bank a spare Foam and Cardboard pair instead of re-farming from zero after the first breakdown. Material forms are on the materials where to find hub.
Which materials gate suit upgrading?
The pinch points are Titanium for carry, and the electronics chain for everything else.
| Material | How it is obtained | Used for |
|---|---|---|
| Titanium | Small spiked-ball object, not a conventional ore seam | Backpack (4 Titanium) — the biggest early carry win |
| Aluminum | Drillable ore node — needs the Drill verb | Crafting and repair recipes; its exact Chapter 1 usage is not yet documented |
| Wires | A confirmed Early Access material; its harvest form is not yet verified by a second source | Machine repairs, including the oxygen station |
| Electronics | Torn out of appliances — a washing machine is the reported example | Repair recipes; reported as the scarcest early material |
| Electrical Tape | Cut off taped pipe runs | Repair recipes; notoriously easy to walk past |
| Foam / Cardboard | Yellow station insulation (Cut) / early salvage | The cold suit build above |
| Ice, Rubber, Refined Metal | Floating ice blocks / industrial pads and panels (Cut) / deep industrial equipment and containers | Oxygen supply, module substrate, higher-tier crafts |
For reference, the Public Oxygen Station repair in the Outskirts costs 3 Metal + 2 Electronics + 1 Wire + 3 Electrical Tape — a good yardstick for how much electronics a single Chapter 1 project eats. Recipes are tabulated in the crafting recipes list.
How do I plan upgrade routes across the map?
Because hazards are gate-shaped rather than level-shaped — solving your protection is the progression, by design — the efficient loop is: read the hazard of the next area, build the matching Protective set at the wardrobe, then go. That makes this a routing problem as much as a crafting one; see the map and all locations index and the beginner guide for the order players take through the first eight to ten hours. Several upgrades also sit behind blueprints that are found rather than awarded, so check blueprint locations before assuming one is quest-locked.
Related Articles
items
Breathedge 2 Metal: Where to Find It and What It Crafts
Metal in Breathedge 2 floats as big round chunks near the crashed train and Outskirts. Where to find it, how to harvest it, and every recipe that spends it.
items
Breathedge 2 Duct Tape: Where to Find Electrical Tape
Where to find Electrical Tape in Breathedge 2: duct-taped pipes on station hulls, the Cutter Tool harvest, and the Oxygen Station repair that needs 3 rolls.
items
Breathedge 2 Plastic: Where to Find Plastic Nodes
Plastic in Breathedge 2 hides as bubbly nodes glued to station hulls and as blocks on wire-run ends. What the nodes look like, the Break verb, and the box trap.
Was this helpful?
Thanks for the feedback!